One of Counter-Strike’s most well-known maps is Dust 2. It has survived almost every iteration of Counter-Strike and almost all players recognize this map dating back to 2001. With that said, there may be a few things that you don’t know about the map like popular smoke or molly spots.
This article will teach you the most important grenade and smoke spots for Dust 2 in CS:GO.
CS:GO – Best grenade spots in Dust 2
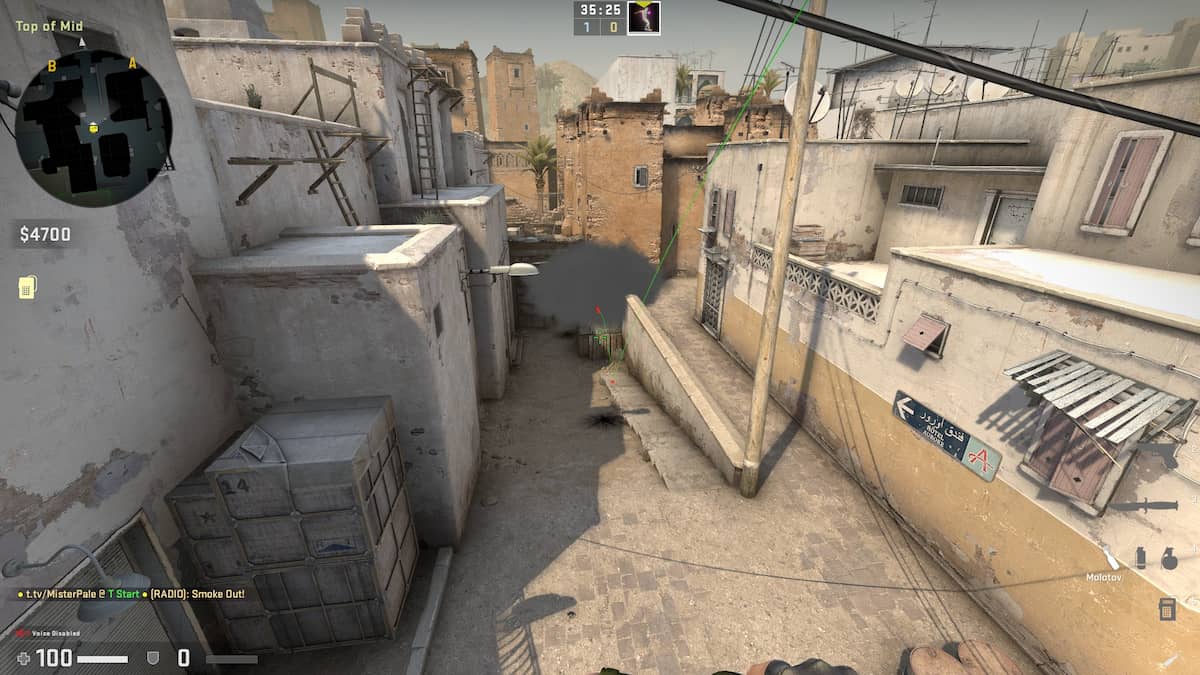
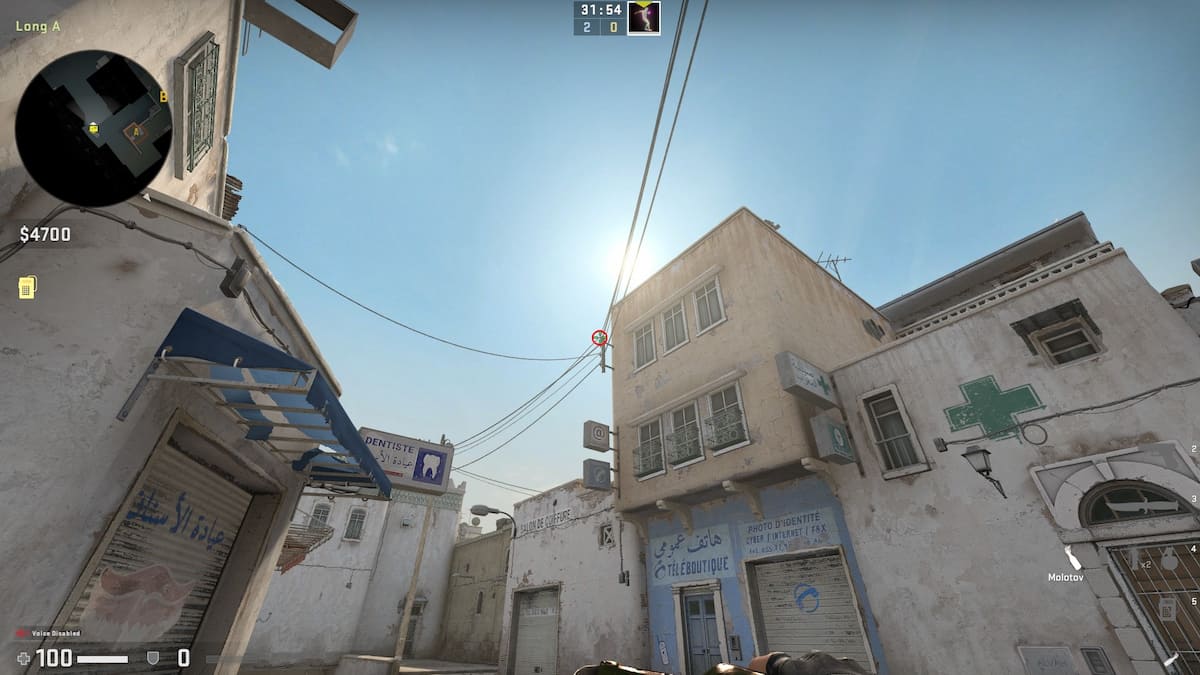
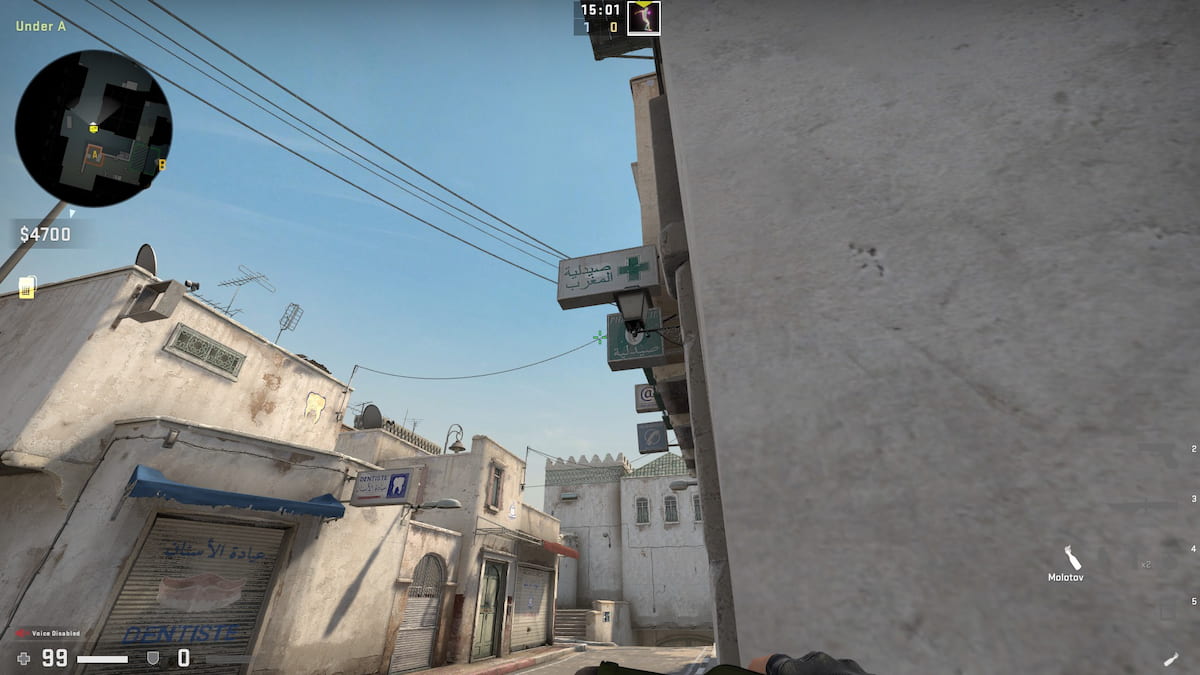
1. A-Site: Long Corner Smoke
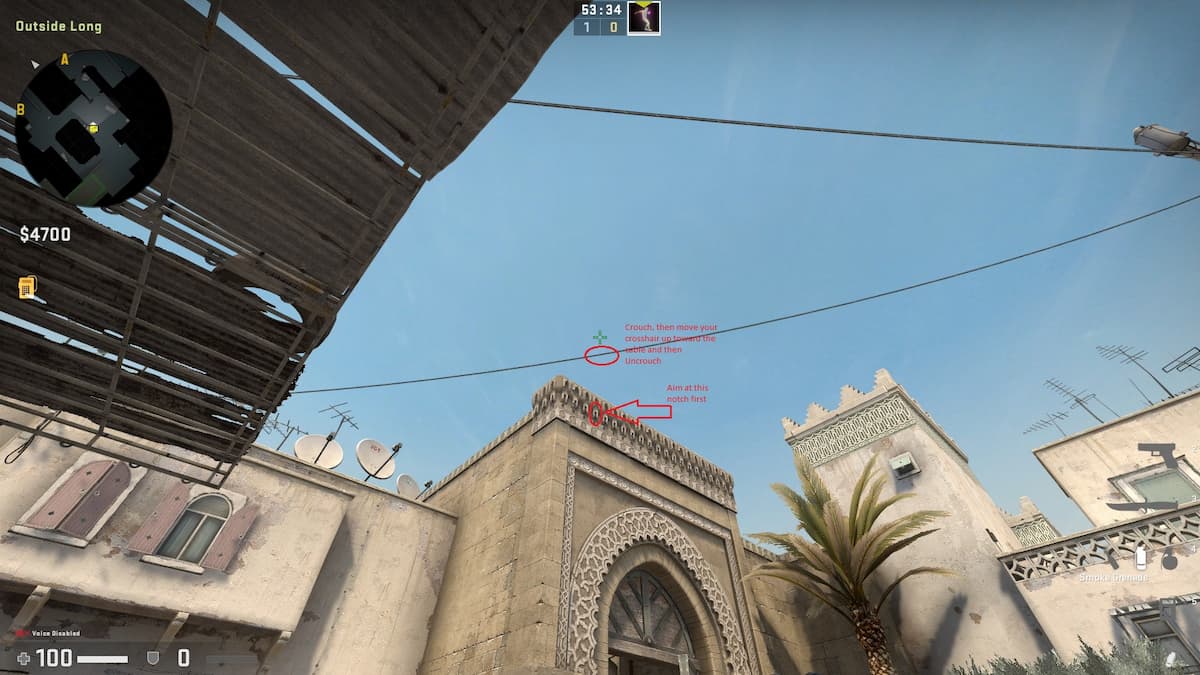
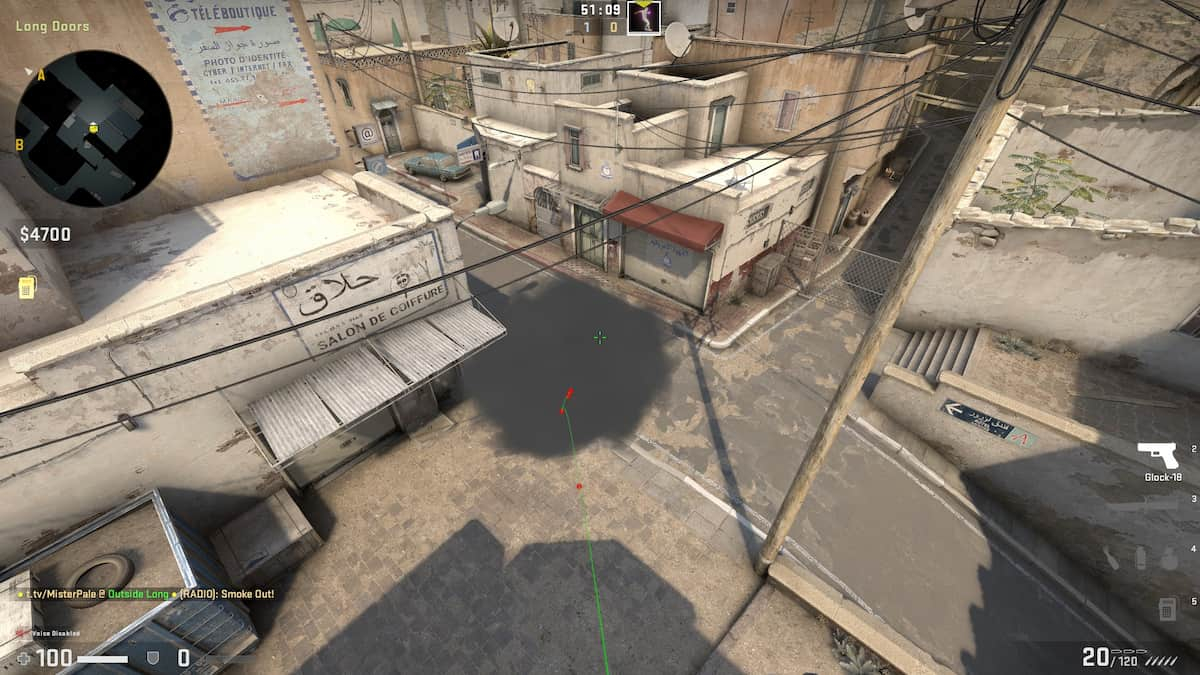
- Go to the corner spot between the stack of boxes at Outside Long. This spot is in front of the car before you enter the double doors on the T-side.
- You’ll see ornaments at the top of the double doors building. After finding the ornaments, aim your cursor at the fourth ornament from the left side.
- Crouch and directly aim at the cable above without moving your mouse horizontally.
- Uncrouch and throw your Smoke Grenade.
This smoke spot is perfect if you want to push A-long double doors in Dust 2, as it will cover the corner perfectly. As a result of this smoke, your enemy will most likely back off to A-site or has to take a risky off-angle outside of the smoke. As an additional tip, pre-aim your cursor at a head level near the edge of the smoke and get ready to pull the trigger if the enemy is there.
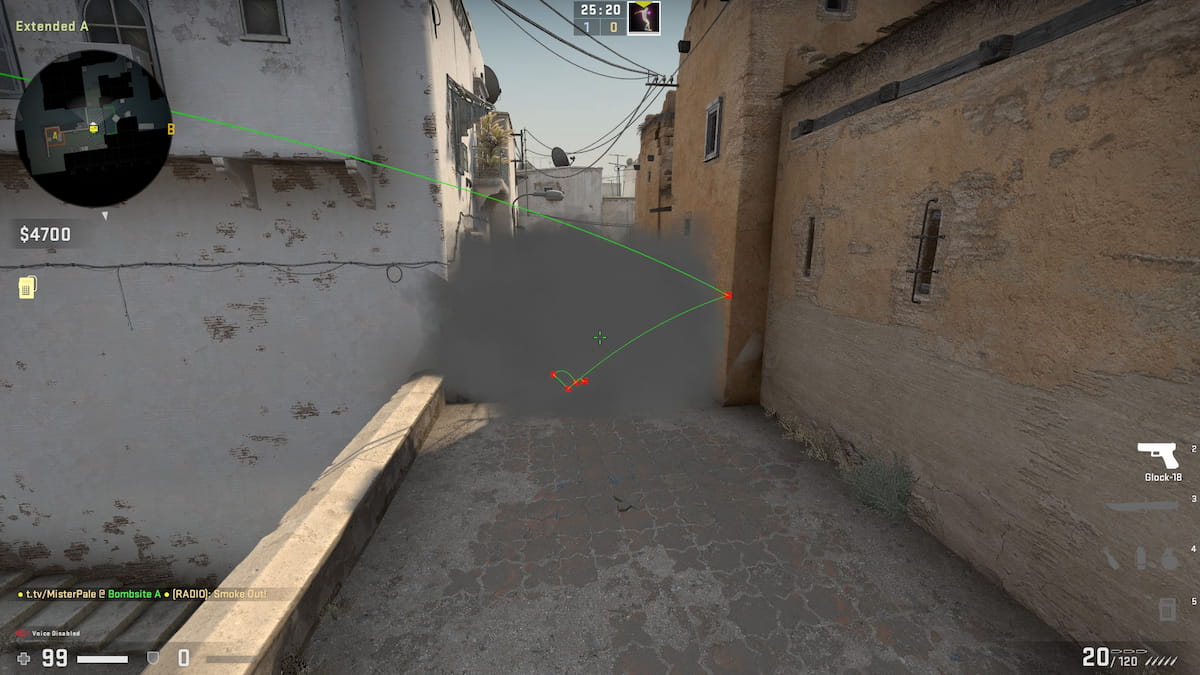
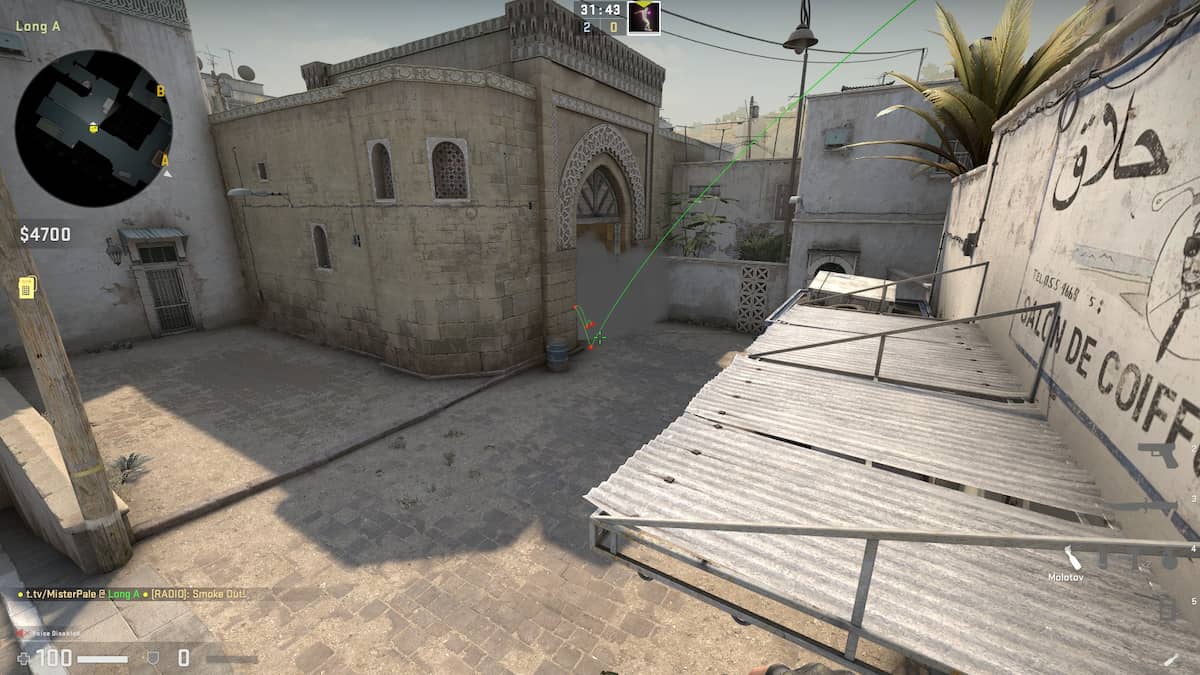
2. A-Long: Cross CT Smoke
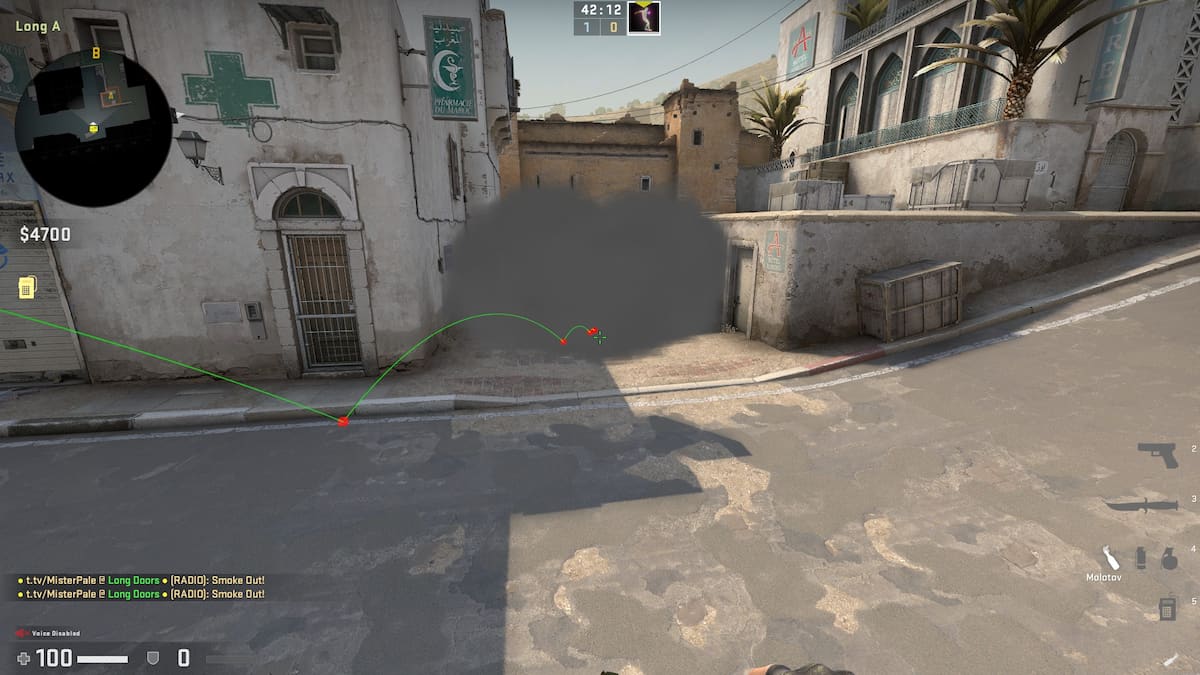
- Position yourself at the corner of the barrel outside A-long’s double doors.
- After that, aim your cursor at the roof edge’s shadow on the ground.
- Lastly, run towards the edge of the building’s shadow and do a jump-throw.
As a result of this smoke spot, you’ll be able to cross A-long to A-site without any danger. This smoke is complex at first, so you need to practice a lot of times to perfect this setup. As an added bonus, you’ll be able to focus and deal with any defenders on A-site instead of having enemies set up a crossfire on your team.
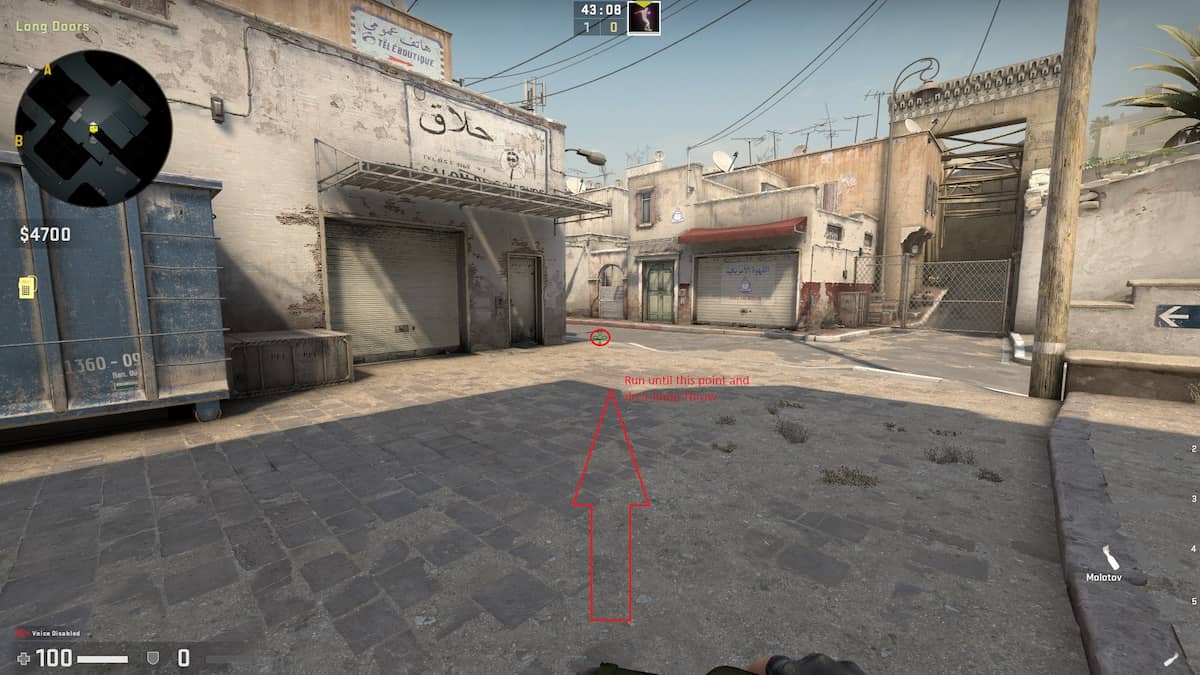
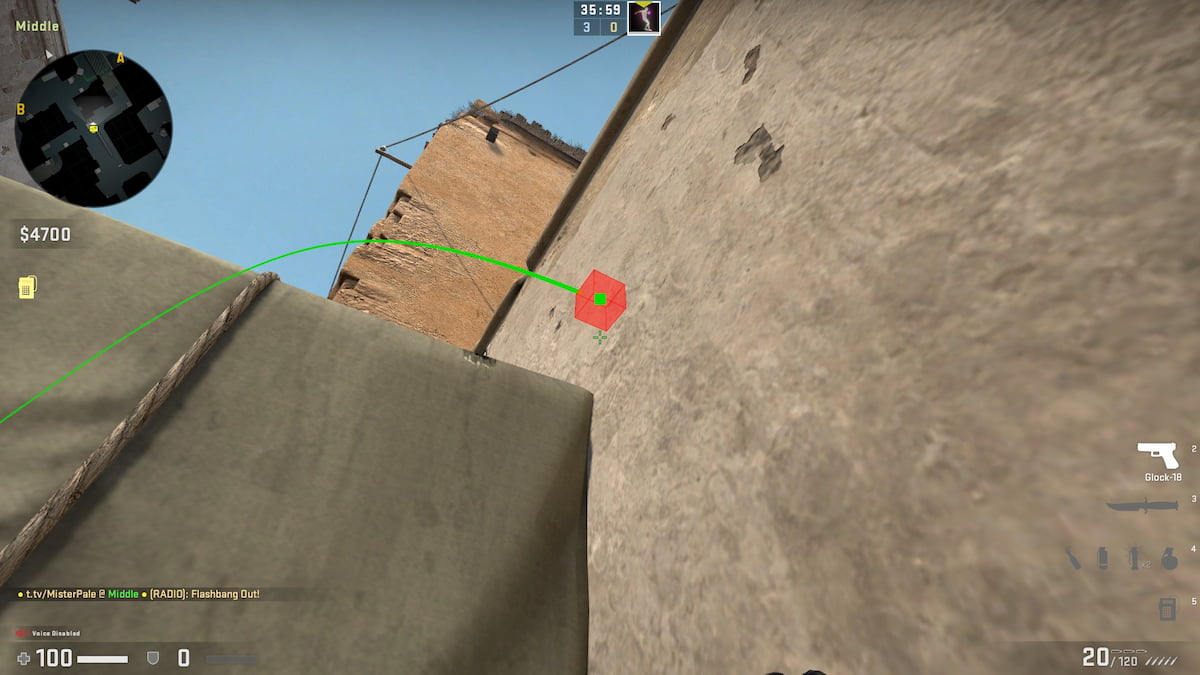
3. Middle: Box Smoke for Catwalk/A-Short
- At the T-spawn, position yourself in the corner of the building (as seen in the photo).
- Next, line your cursor to the building’s shadow and move your cursor up until you match the height of the shed on the rooftop. Your cursor should make a 90-degree angle with the shadow, and the rooftop shed.
- Perform a jump throw with your Smoke Grenade. Your grenade should land on top of the box in mid.
This smoke is efficient when you want to support your team who wants to push A-Short/Catwalk. Furthermore, this stops AWP-ers from peeking through A-short and even enemies in the lower tunnel.
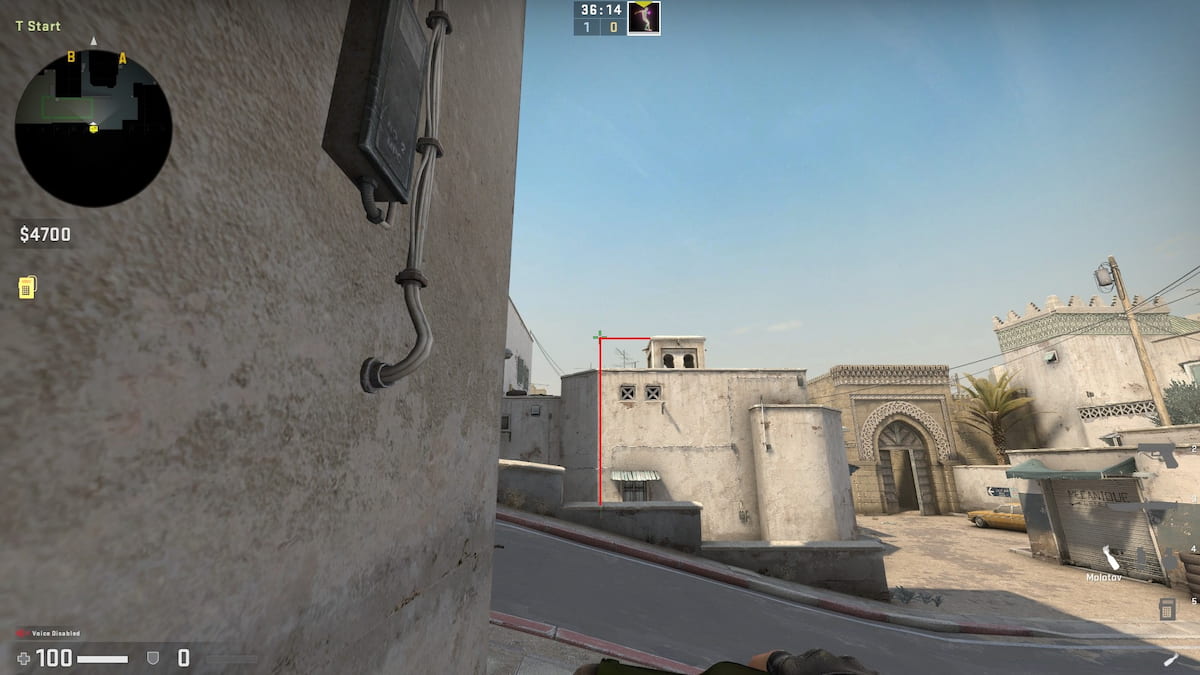
4. Middle: CT Spawn Smoke
- Position yourself at the corner of the box in mid. Be careful in this position because you’re exposed to the Lower Tunnel.
- Aim at the small patch on the wall (as seen in the picture).
- Perform a regular grenade throw; the smoke grenade should land perfectly on CT Spawn.
Performing this smoke is easy yet crucial if you want to push through the B-site from Mid. It essentially blocks AWP-ers from the other side. You can also perform a crossfire setup for anyone who’s going to B-site while you’re defending.
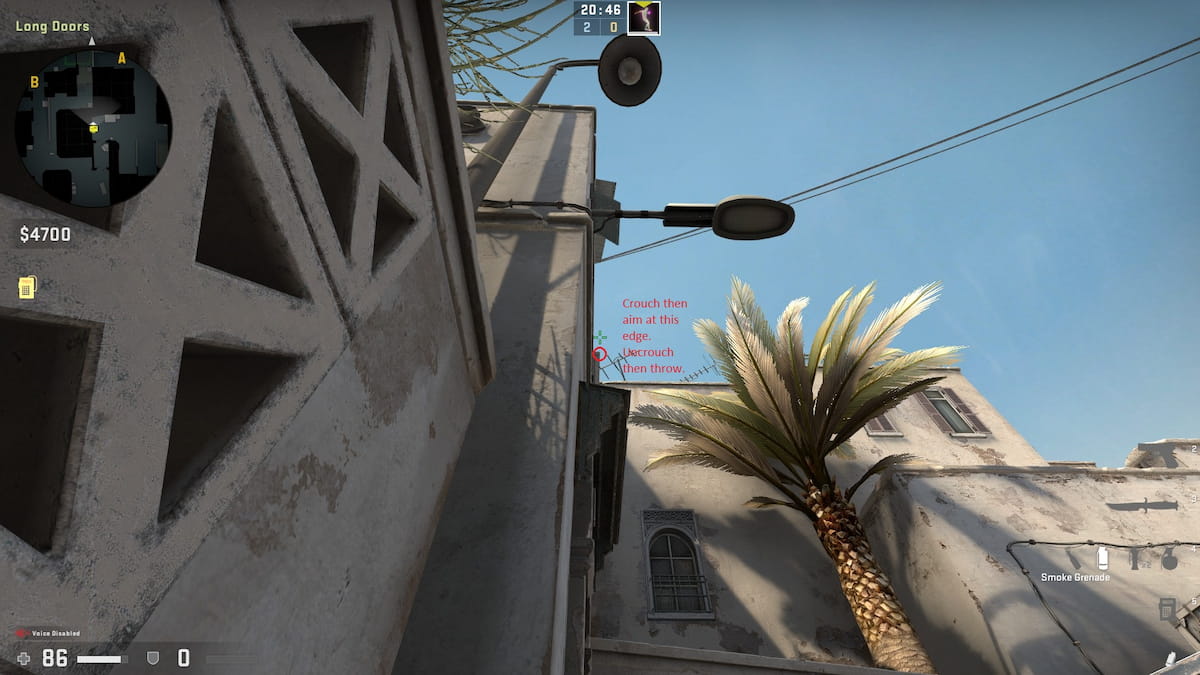
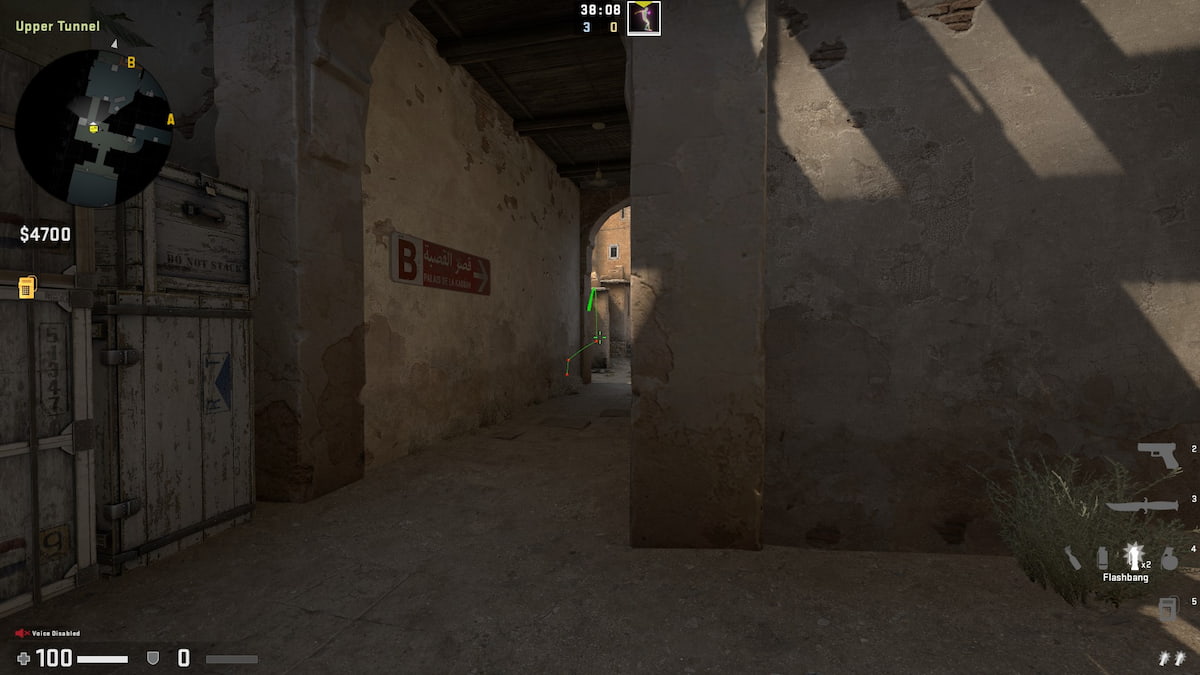
5. Upper Tunnels: B-Site Double Door Smoke
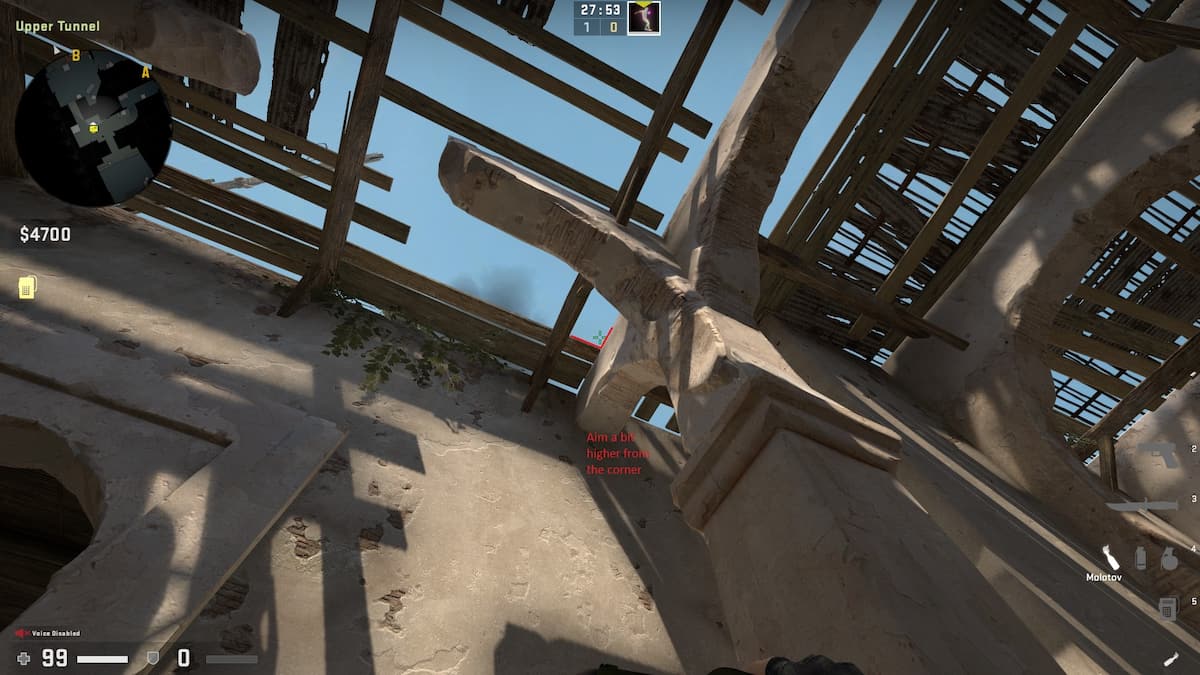
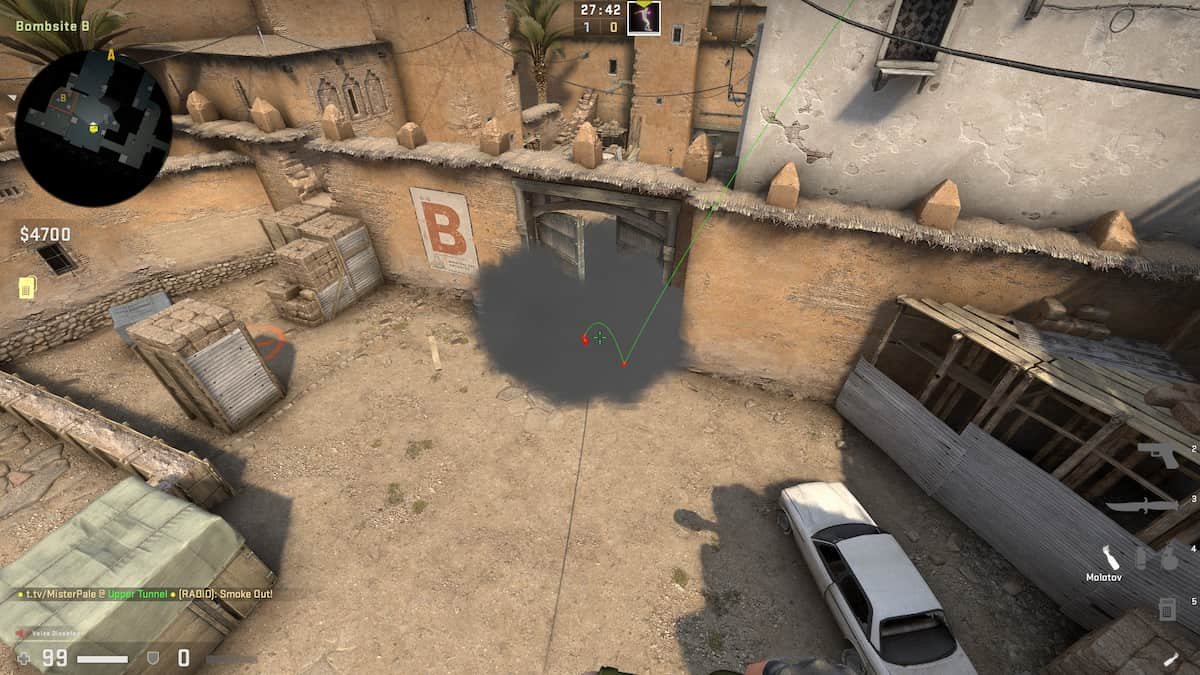
- At the Upper Tunnel, line yourself with the middle of the chest.
- After doing that, walk up to the chest and aim up.
- You should see a bunch of woods with an opening.
- Aim at the corner of the wood that is perpendicular to the pillar. Adjust your aim by a few pixels above that corner.
- Throw your smoke grenade, and you should be able to land a smoke on B-Site’s Double Doors perfectly.
This smoke is easy to perform, yet it has a lot of benefits. First, you’ll be able to effectively reduce the crossfire spots when entering B-Site from the tunnels. Second, you’ll easily stop pushes from mid to B-site’s double doors. Lastly, when defending B-site, your team can easily set up your own crossfire since enemies will most likely push through the window.
6. A-Site: A-Short Smoke
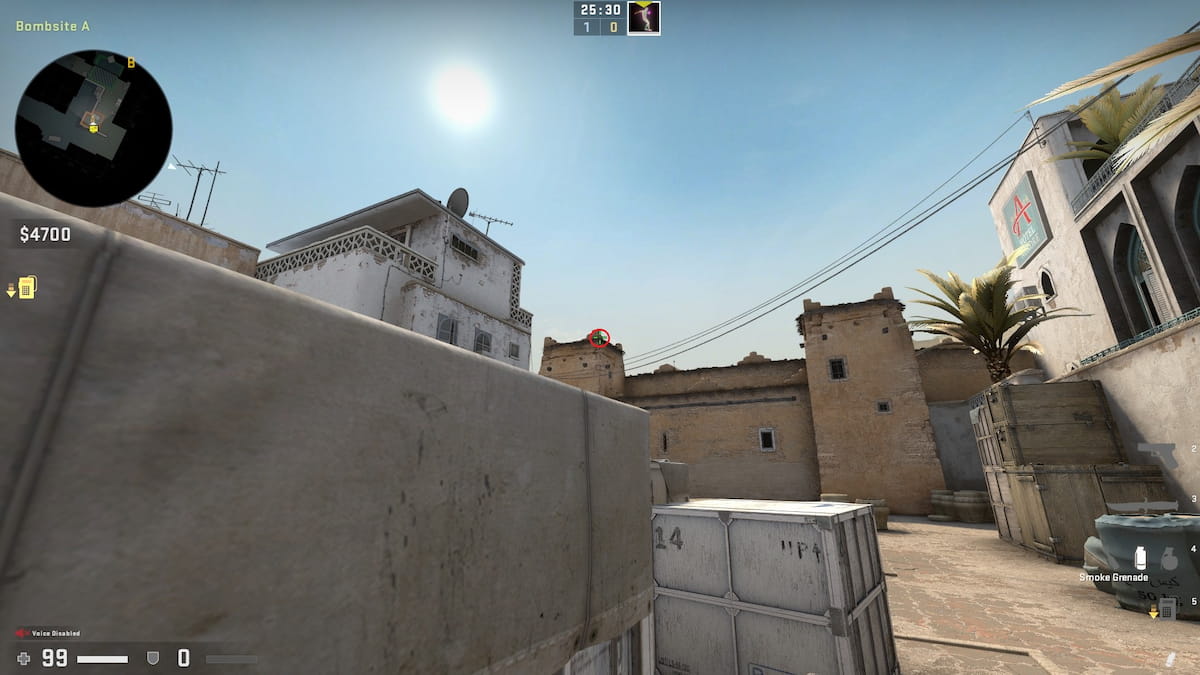
- Position yourself at the corner of the box in A-site, as seen in the picture.
- Aim at the upper corner of the light-brown building below the small pillars.
- Throw your smoke grenade; the smoke should land directly at A-Short to A-site’s entry point.
You can quickly master this important smoke in a matter of minutes. The most significant benefit of this smoke is stopping A-short rush pushes with just one utility. If enemies decide to push through, you and your team can wipe them out since you can predict their position after exiting the smoke.
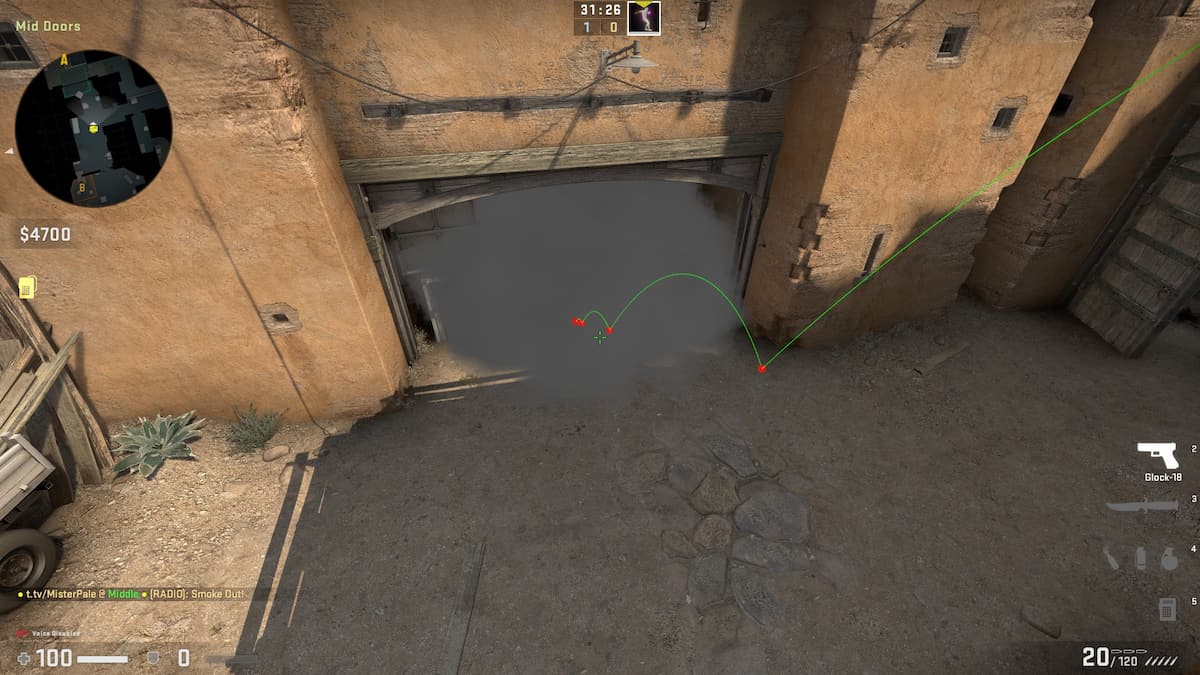
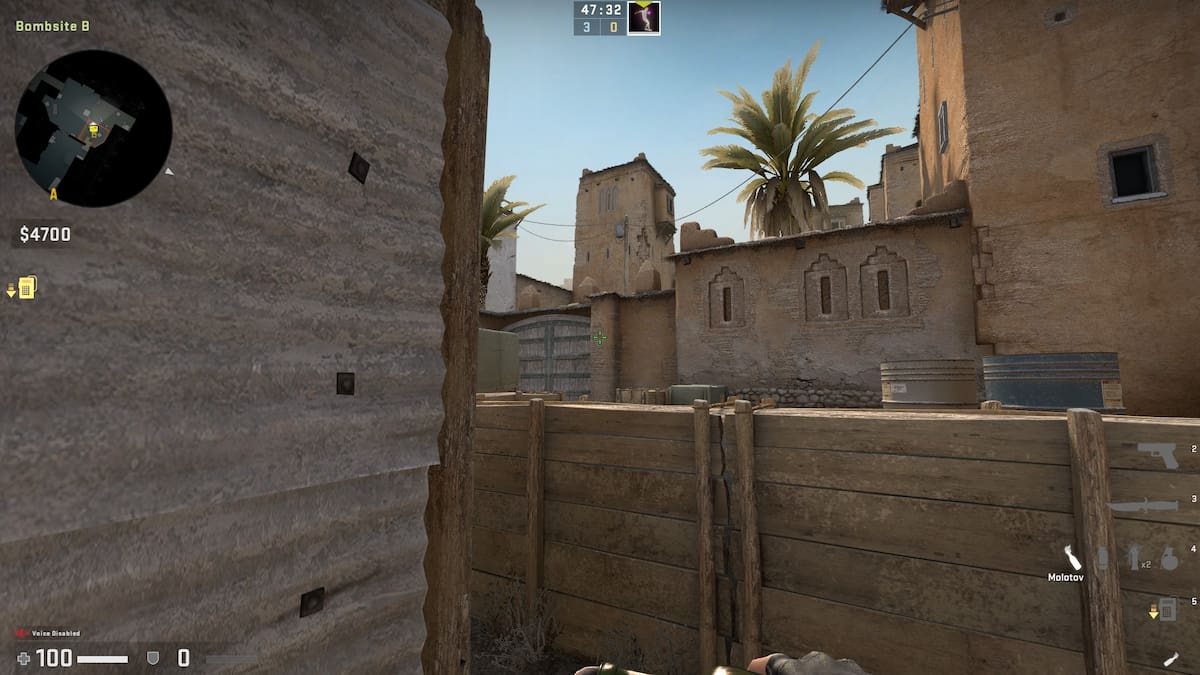
7. Middle: B-Site Tunnel Smoke

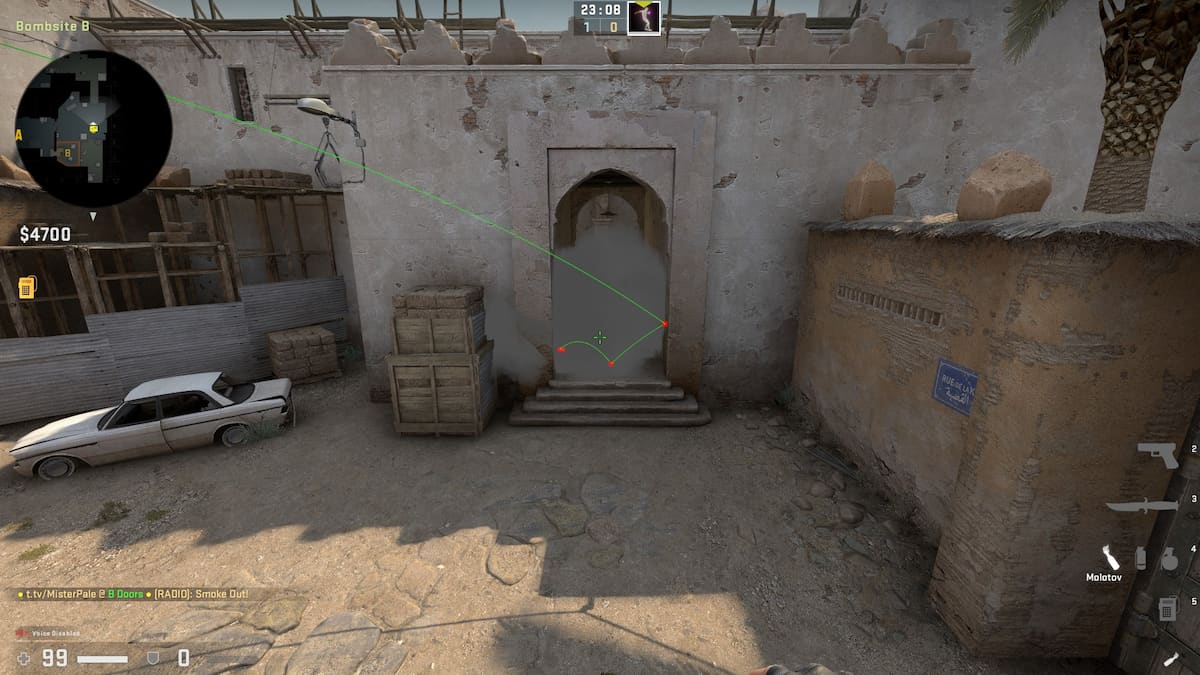
- At the building in front of the truck in mid, you should be able to spot a small window-like opening. Stand in front of it.
- After doing so, aim at the middle of the crane’s circular part.
- Throw your grenade, and it should land directly on the Tunnel Doors.
This is one of the most effective smokes you can use when retaking the B-site. If the enemy decides to plant for Tunnel, then this smoke will obscure their vision. Moreover, you’ll be able to defuse the bomb without any real threat from the Tunnel door.
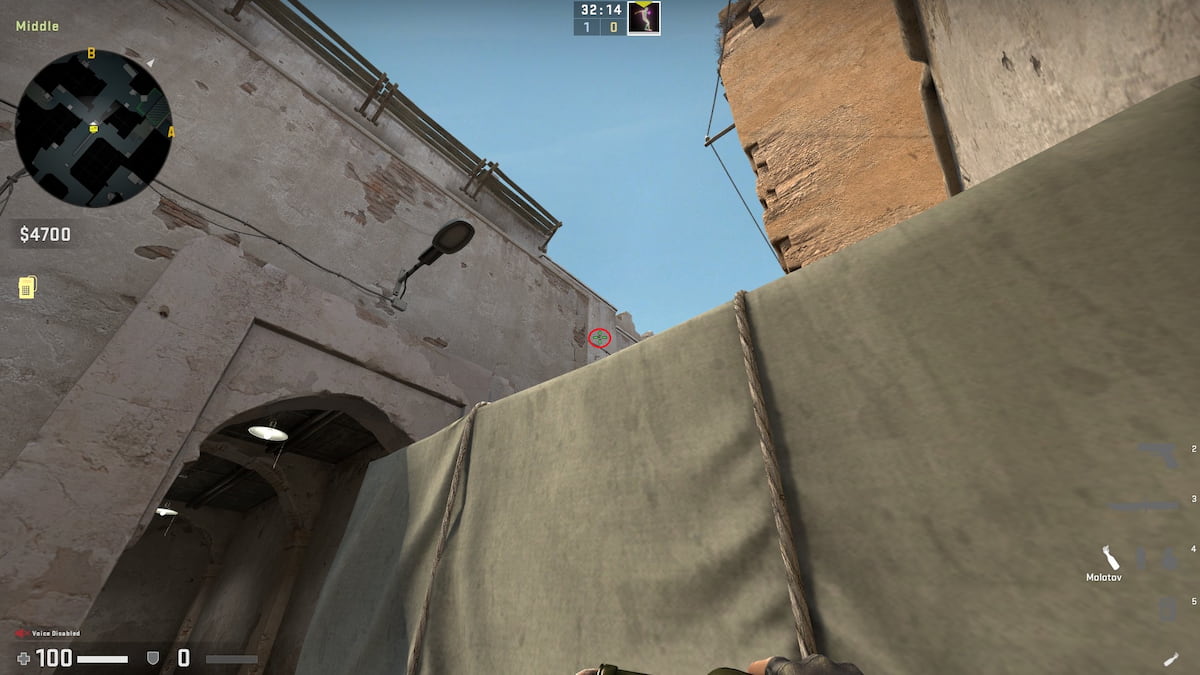
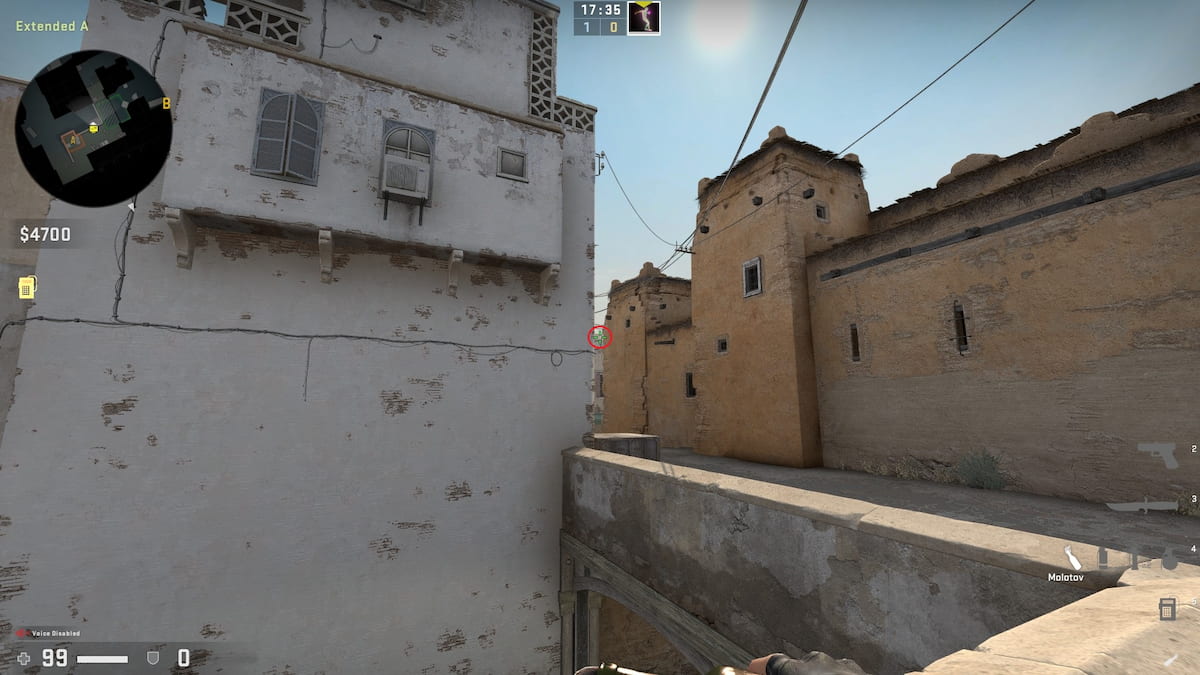
8. A-Long: Double Doors Safe Smoke
- If you’re defending A-Long, then go to the “new” car’s back doors and align yourself with its handle.
- Next, as seen in the picture, you want to aim at the circular part of the highest wooden pole on the building to your right.
- Lastly, throw your smoke grenade.
This smoke effectively stops pushes through A-Long double doors. In addition, you won’t be exposing yourself to your enemies while doing this lineup. Lastly, you can set up a crossfire at the corner of A-Long and have your teammate position themselves in the Pit.
9. A-Long: Perfect CT Spawn Smoke
- Upon exiting the double doors in A-long, you should see a pile of hollow blocks to your left-hand side.
- Aim your cursor and the middle, and walk toward the hollow blocks.
- Once you’re next to the blocks, crouch.
- Aim for the tiny edge of the roof and then uncrouch.
- Throw your smoke grenade, which will bounce off the roofs and into CT Spawn.
This lineup is a variation of the Cross CT Smoke if you want to block the entire CT spawn’s vision. One drawback of this smoke is that enemies will have vision of your team crossing A-Long. Hence, this smoke lineup is useful when your team already has A-site, and you’re looking to push in with A-long, or you have the information that an enemy is guarding in mid toward “cross.”
10. A-Site: A-Short Flashbang
- Position yourself at the corner of the two wooden drums near A-Short.
- Next, aim at the roof of the building or just below it.
- Throw your Flashbang.
Moving away from Smokes, we’ll also include a few support flashbang spots. This lineup is highly effective when your teammate waits at the corner of A-Short before Catwalk. Pop the flash and your teammate can immediately peek at little to no risk.
11. A-Long: Double Door Flashbang
- You should position yourself at the corner of the building in A-Long, similar to the picture.
- Use your cursor, and then aim at the middle part of the all-green sign.
- Next, you’ll need to adjust your cursor away from the sign.
- Lastly, throw your flashbang.
Similar to the previous flashbang, this flashbang lineup will support your teammate who’s guarding Double Doors at the corner position of A-Long. Moreover, this is highly effective for leveraging against enemies rushing to push A-Long.
12. Outside Long: Double Doors Flashbang
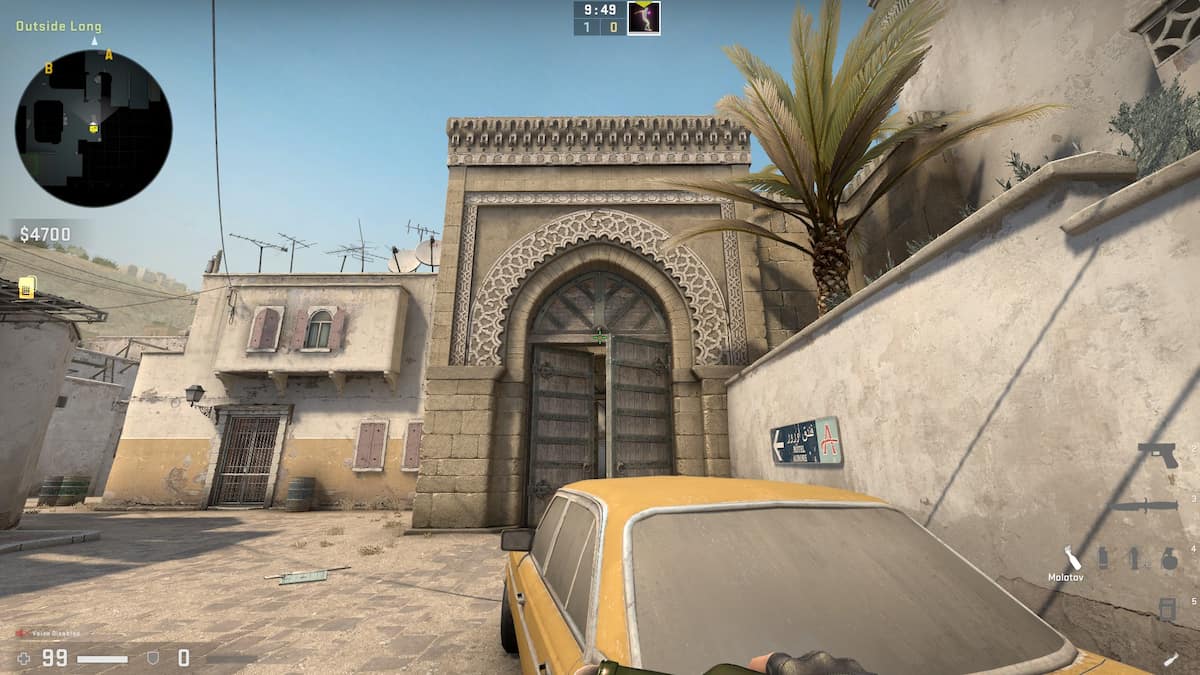
- First, position yourself at the tail end of the yellow car.
- Aim your crosshair in the middle ridge of the double door.
- Throw your flashbang, which should pass through the two double doors.
On the opposite end of the double doors, this is highly effective when you have a teammate who wants to push A-Long Double Doors safely. As a result of this lineup, the flashbang will blind enemies in the A-Long corner, Pit, and even behind the double doors. You should mostly use this if you don’t want to invest a smoke grenade for A-long corner.
13. B-Site: Safe Tunnel Door Flashbang
- Stand behind the big box with a metal sheet in B-site (just above the B spray paint).
- Then, look at the wall pillar to your right.
- Throw your flashbang against the wall, which should bounce and blind enemies in the tunnel area.
This is a very nifty flashbang lineup that will instantly give you the upper hand when enemies are rushing through the tunnel and onto B-site. One of the main benefits of this lineup is that you’re safe, and enemies will not spot you before you throw the grenade. Lastly, you’ll have the upper hand over dueling enemies who are entering B-site through the tunnels, and you may even win 1v5 situations.
14. Upper Tunnel: B-Site Flashbang
- As you’re heading out of the tunnel area, run and aim at the wall to the left.
- The flashbang will bounce off of the wall and blind the B-site.
This flashbang is easy to do and doesn’t require much practice. If you decide to use this flashbang, you will flash almost every player in the B-site except for your teammates rushing with you from the Tunnel Doors. Communicate with your teammate and ensure that no one is at the back site of B because this lineup won’t flash that area.
15. Middle: Double Door Flashbang
- Stand in the corner of the box in mid.
- Aim at the left-hand corner and adjust your cursor by a few pixels above.
- Throw your flashbang.
The most effective way to infiltrate mid-double doors is by using this flashbang lineup. As a result of this flashbang lineup, enemies guarding double doors, even ones at CT spawn, will be blinded. This flash will catch many enemies by surprise, so remember to use this often if you find yourself in a clutch situation with an M4A1 at mid.
Trending